Personalize Your Computer Preview
Before we change anything, let's talk about what you see now.
This is probably what the top of your screen looks like when you are running this program:
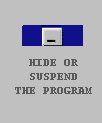
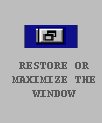
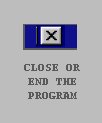
The blue bar along the top is known as the TITLE BAR. To the far right side of the title bar are three small buttons that look like this:
The button on the left (Minimize) will Hide or Suspend a program.
The button in the middle (Maximize/Restore) adjusts the size of the window.
The button on the right (Close) will close or end the program.
Under the TITLE BAR is the MENU BAR.
It includes words like "File", "Edit", "Print", etc." This is where you find all the options and things you can do. For example, in this program, under "File" you will find "Open", "Save", "Save As", "Close" and/or "Exit". Each program will have its own Menu Bar and its own options.
Then you will find a TOOLBAR with icons. (An icon is a little picture which represents a program or a tool or a function.) Some of these may be shortcuts for options that are in the MENU BAR. Others are tools specific to the program you are running.
For example, as you are reading this you have a TOOLBAR with a "Back" arrow, "Stop" "Refresh" and "Home" icons. You will get to know the meaning of all the icons as you learn different programs on your computer.
This is what the bottom of my screen looks like right now:
The bar which says "Done" is a STATUS BAR.
Again, depending on what program you are running, the STATUS BAR will provide you with information about where you are. In word processing programs it will tell you what line you are on; in graphics programs it will tell you the location of the pixel your mouse is pointing to. On the Internet it will give you messages such as "Web site found".
Below that is a TASKBAR which includes your "Start" button, information about open files, the time, and for Windows 98® users, your Quick Launch Toolbar.
This is a review and continuation of some of the material in How To... and is written as a sequel to it. While each of these "books" will stand alone, you'll get more out of Personalize Your Computer if you have read How To... first.
Let's go back to the three buttons in the upper right hand corner of your screen.
In order to write this lesson I used several programs.....Jasc PaintShopPro® for the pictures, Edit Pad® to write in, Windows Explorer® to find the file, and Internet Explorer® to view how it looks. All these programs are open but I don't want to try to see all of them at the same time. So I used the left hand button at the top.
Clicking it will minimize or suspend these files. Their titles will appear on the taskbar on the bottom of my screen and clicking on the taskbar will bring it back. Go ahead and try it!* Just click on the left hand button and the name of this file, Personalize Your Computer, will appear on the taskbar on the bottom of your screen. Then click on the name of the file and it will come back.....honest!
*(If you don't feel comfortable playing around with those buttons yet, go to How-To...Lesson #2. I've set up practice sessions there which take you step-by-step through this material.)
Now try clicking the middle button.
It is a toggle switch to make your screen bigger or smaller. If you put your mouse pointer over this button you will see the word Restore appear if your screen is big and the word Maximize if your screen is small.
We will use this button in just a moment to change the size of your screen but first let's look at the button on the right with an X on it.
DON'T click on it yet!
There are two ways to close files:
You can go to the top of your screen to the MENU BAR and click on "File" and then "Exit".
ORYou can use this third button and simply click on the X to close your file.
OK, that's an introduction to what you now see on your screen. You'll soon be able to change many of the items you see such as the color of your TITLE BAR and the placement of your TASKBAR.
Let's get started. In order to read these chapters and make the changes as you go along, you need to be able to see your desktop (the screen you see when you first turn on your computer).
There are two ways to go about it. You can use your minimize button (the left one of the three on your title bar)and this file will minimize with only its title showing on your taskbar at the bottom of the screen. You can then toggle back and forth. - Not a very satisfactory solution for this situation.
Instead, use the middle button to "restore" your screen. It will become smaller and now you can find the outline or edges of the window.
Move your mouse pointer to one side of this window and you'll see the arrow change from a pointer to an arrow pointing left and right.
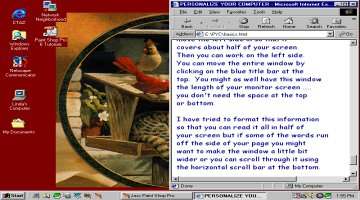
When you get that double pointed arrow, hold down your left mouse button and "drag" the sides so that this window is narrower. We suggest you line up the right side of the window along the right side of your screen and move the left side in so that it covers about half of your screen. Then you can work on the left side. You can move the entire window by clicking on the blue TITLE BAR at the top. You might as well have this window the length of your monitor screen .....you don't need the space at the top or bottom.
I have tried to format this information so that you can read it all in half of your screen but, if some of the words run off the side of your page, you might want to make the window a little bit wider or you can scroll through it using the horizontal scroll bar at the bottom.
This is what it should look like...except, of course, you have a different desktop picture.
If you had any trouble understanding this material or difficulty changing the size of this screen, please read lesson #2 in How-To... for more detailed instructions.
OK, Let's go to work!
Please click here to go to the table of contents, then click on Part I: Sights to begin.
*Windows* refers to Microsoft Windows 95® or Microsoft Windows 98®.


